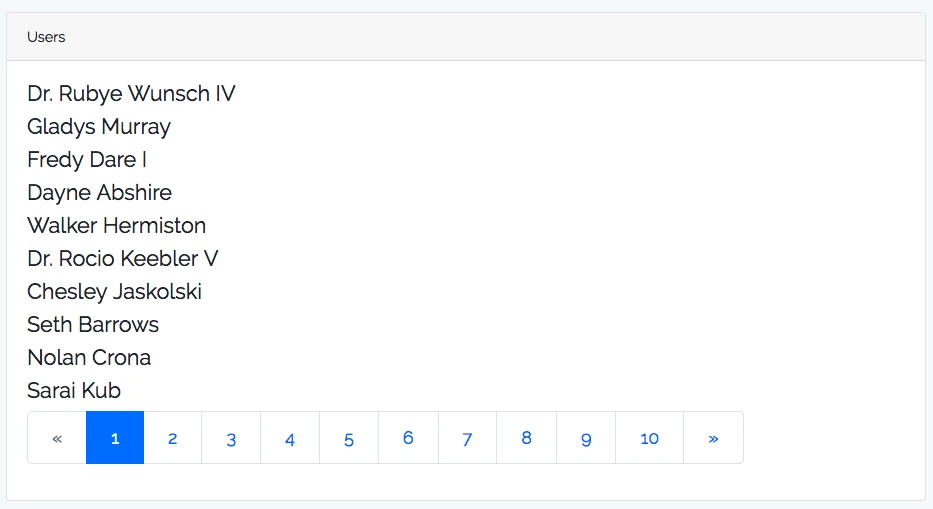
مرحله 1 ایجاد پروژه لاراول:
ابتدا اقدام به ایجاد یک پروژه لاراول به اسم بلاگ میکنیم .
composer create-project --prefer-dist laravel/laravel blog
مرحله 2 ایجاد migration:
اقدام به ایجاد یکmigration به وسیله دستور زیر میکنیم (migration برای ایجاد یک یا چندین table و روابط آندر database است) .
php artisan make:migration create_categories_table
مرحله 3 تغییر migration:
پس از ایجاد migration مورد نظر در این مسیر database/migrations آن را بصورت زیر تغییر میدهیم
<?php


use Illuminate\Support\Facades\Schema;
use Illuminate\Database\Schema\Blueprint;
use Illuminate\Database\Migrations\Migration;


class CreateCategoriesTable extends Migration
{
    /**
     * Run the migrations.
     *
     * @return void
     */
    public function up()
    {
        Schema::create('categories', function (Blueprint $table) {
            $table->increments('id');
            $table->string('name');
            $table->timestamps();
        });
    }


    /**
     * Reverse the migrations.
     *
     * @return void
     */
    public function down()
    {
        Schema::dropIfExists('categories');
    }
}
مرحله 4 ایجاد جدول:
برای ایجاد شدن tabel در دیتابیس دستور زیر را در ترمینال وارد میکنیم
php artisan migrate
مرحله 5 ایجاد مدل:
برای ایجاد شدن Model دستور زیر را وارد میکنیم. (Model برای ارتباط لایه application با database است.)
php artisan make:model category
مرحله 6 تغییر مدل:
model مورد نظر در آدرس app/category.php را مانند زیر تغییر میدهیم .
<?php


namespace App;


use Illuminate\Database\Eloquent\Model;


class Category extends Model
{
    /**
     * The attributes that are mass assignable.
     *
     * @var array
     */
    protected $fillable = [
        'name'
    ];
}
مرحله 7 ایجاد route:
route زیر را در آدرس routes/web.php تعریف میکنیم .
Route::get('categories', 'CategoryController@index');
مرحله 8 ایجاد controller:
اقدام به ایجاد controller در فریم ورک لاراول با دستور زیر میکنیم .
php artisan make:controller CategoryController
مرحله 9 تغییر controller:
CategoryController را در آدرس app/http/controller یه شکل زیر تغییر میدهیم .
<?php

namespace App\Http\Controllers;

use Illuminate\Http\Request;
use App\Category;

class CategoryController extends Controller
{
    /**
     * success response method.
     *
     * @return \Illuminate\Http\Response
     */
    public function index()
    {
    	$data = Category::paginate(10);
    	return response()->json($data);
    }
}
مرحله 10 نصب node moule ها:
خط به خط دستورات زیر را برای نصب module ,vueهای موجود در فایل package.json را در ترمینال وارد میکنیم
composer require laravel/ui --dev

php artisan ui vue

npm install

npm install vue-resource

npm install laravel-vue-pagination
مرحله 11 افزودن component :
در مسیر resources/assets/js/app.js دو component را مانند زیر اضافه میکنیم
require('./bootstrap');

window.Vue = require('vue');
Vue.use(require('vue-resource'));

Vue.component('data-component', require('./components/DataComponent.vue'));
Vue.component('pagination', require('laravel-vue-pagination'));

const app = new Vue({
    el: '#app'
});
مرحله 12 ایجاد component:
در مسیر resources/assets/js/components/DataComponent.vue را مانند زیر ایجاد میکنیم.
<template>
    <div class="container">
        <div class="row justify-content-center">
            <div class="col-md-8">
                <div class="card">
                    <div class="card-header">Laravel vue pagination - ItSolutionStuff.com</div>

                    <div class="card-body">
                        <ul>
                            <li v-for="tag in laravelData.data" :key="tag.id">{{ tag.name }}</li>
                        </ul>
                        <pagination :data="laravelData" @pagination-change-page="getResults"></pagination>

                    </div>
                </div>
            </div>
        </div>
    </div>
</template>

<script>
    export default {
        mounted() {
            console.log('Component mounted.')
        },
        data() {
            return {
                laravelData: {},
            }
        },
        created() {
            this.getResults();
        },
        methods: {
            getResults(page) {
                if (typeof page === 'undefined') {
                    page = 1;
                }

                this.$http.get('/categories?page=' + page)
                    .then(response => {
                        return response.json();
                    }).then(data => {
                        this.laravelData = data;
                    });
            }
        }
    }
</script>
مرحله 13:
در مسیر resources/views/welcome.blade.php را مانند زیر تغییر میدهیم .
<!DOCTYPE html>
<html>
    <head>
        <meta charset="utf-8">
        <meta name="csrf-token" content="{{ csrf_token() }}">
        <meta http-equiv="X-UA-Compatible" content="IE=edge">
        <meta name="viewport" content="width=device-width, initial-scale=1">
        <title>Laravel 5.6 Vue JS Pagination</title>
        <link href="{{asset('css/app.css')}}" rel="stylesheet" type="text/css">
    </head>
    <body>
        <div id="app">
            <data-component></data-component>
        </div>
        <script src="{{asset('js/app.js')}}" ></script>
    </body>
</html>
در انتها دستور زیر را وارد نمایید
npm run dev
لاراول مباحث زیادی دارد بهتر است برای یادگیری آموزش لاراول را مطالعه کنید


